CLICK HERE FOR FREE BLOGGER TEMPLATES, LINK BUTTONS AND MORE! »
Showing posts with label Technique Embossing. Show all posts

Friday, June 17, 2011

Tempting Mojo

Hello again,

A little more time in Girl World today led to a completed Mojo Monday entry – No 195 to be precise!

I picked up this lovely silhouette stamp at the Brisbane Papercraft Fair and think she looks rather delightful in Tempting Torquoise ink, hence the name for this post – here’s my entry, Tempting huh…

P1020220

The sentiment is a simple Happy Birthday (part of my favourite Annabelles Stamps set “All Things Grow” and was amazed to find that it fits the SU Word Window punch perfectly!

P1020222

There’s a pile of Kaiser flowers, gold brads, ribbons and ric-a-rac that make up the rest of this card. Oh – and the flowers embossed on the background – this was a small free folder that came with a Do Crafts magazine at some stage, am very happy with that, there's also a fiskars edge punch, spellbinders circle & scallop circle etc etc.

Here is the sketch I was following…

Mojo195Sketch

Hope you all have a great week-end – TTFN

(TTFN = ta ta for now Smile )

Tuesday, June 14, 2011

Standing Before God for CPS 222 / 1

Hello Everyone,

I bet that title got your attention!

I love the sentiment on this sticker, its a 7 Gypsies product and I received two whole sheets of these stickers in a pizza box full of vintage papers and elements for my birthday this year. (thanks Trish).

Here’s my card for entry into the Card Positioning System challenge # 222
I really liked this sketch as it was quick and simple to do, as well as being perfect for the sticker.


The paper is one double sided sheet called Lilac House – Tapestry #953. It has these gorgeous big paisley patterns on one side and a distressed linen look in plain pinkish/coralish/red on the other side.

I layered it up onto some green card that has been embossed with a script writing embossing folder and some ribbons and glitter along the edge of the ric rac ribbon.

I had a wonderful day at the Craft Fair in Brisbane yesterday with two of my ‘besties'. Just wait til you see some of the things that I bought! I’ll be showing them off proudly over the coming weeks.

Have a great day now Smile

Wednesday, June 8, 2011

More Papermates

Hi Everybody,

I finally finished off the remaining cards from the kits I received at Paper mates. (see previous post for the first lot).
I’m going to post these ones into a couple of challenges each, so I’ll link challenges up under each card.

First is my own kit – I really love what Trish did with these materials and found it hard to come up with something remotely as good Smile (love you anyways Trish!)
Here are the two cards I made with my own kit…
P1020205
This first one is a favourite of mine, simply for the sentiment – if only we could get away with doing all the Nothing we want!
The second one below, I took advantage of a pattern that was on the reverse side of the butterfly paper and used it as a central piece and layered the gorgeous little butterfly over it. The paper around this decal was a lovely script writing (as seen on Trish’s card).
P1020196
Here’s a close up of that butterfly – it was a cheap shop find and very pretty.
P1020197 
a few gold brads down the centre to go with the little badge sentiment of beauty.
I’ll post this into these challenges:

The next  card was the remaining bits from Cheryls kit…
P1020203

I coloured this in with twinkling H20’s and did a pile of distressing and even used the bag the bits came in. I had to add my own sentiment here, but that’s not a bad thing.
These are the challenges I’ll enter this into:

Last but not least is from Anne’s kit (and I still have one more to make with this kit!)
P1020200

There’s that feather I was telling you about in the first post. Looks fab with the little silver fan and that swirly paper. A silver foil Happy Birthday sticker and  a little ribbon and there you have it!
These challenges suit this card

Well that’s it for me for the moment. My Mojo card for this week will be along in a day or two – it’s almost done!
As always – hope you like the cards Smile

Sunday, May 22, 2011

Rosey Mojo

Hello Everyone,
I’ve gone all rosey for Mojo Monday #191 and figure it’s the perfect card for my Nanna’s freinds’ 95th Birthday. It says nothing about Birthdays, Age or Life in general – it is just plain pretty. Lets face it – by 95 you’ve heard it all but you’ll still appreciate Prettiness. I hope!
This is my card…
P1020142 
and this is the sketch this week…
Mojo191Sketch
I used a cuttlebug embossing folder on only half of the base apricot colour card and surrounded the different elements with gold foil stickers to make them stand out. The gorgeous little stamp (which is out of it's packet and has no name) has been gold embossed on a spellbinder circle and layered on a spellbinder scallop to match. A few gold brads and a nice banner and voila! done!
Hope you like my take on the sketch this week. I was aiming for a vintage feel without the shabby bits Smile

Saturday, May 21, 2011

Purple Haze Birthday

Hello again,
Just wanted to quickly share another card I made using “All Things Grow” from Annabelle Stamps 
(yes – again! Get used to it, I’m in love with this stamp set and this is probably only the beginning)

P1020136

I started out with white cardstock and used my SU stampin spot in  {crumb cake} colour to swipe the colour on straight with the spot. I then embossed the grasses across the bottom of the card. Went back to the stampin spots with {river rock} and added some green along the back of the grass. I then used a sponge and some {not quite navy} to highlight the night sky which blended to purple {elegant eggplant}. I then went and stamped some more grasses in purple to make them really stand out.
An SU Scallop punch, Oval punch and Word Window were used to mount the Happy Birthday sentiment from the set.
I love how this card came out, however, I think my blending needs a little more practice. Back to more playing with this stamp set it is.

The girls over at C.R.A.F.T Challenge are having a Birthday Blog Hop and Happy Birthday card challenge. This is my entry.

Crafty Cardmakers wanted embossing - well it sure is!

Hoping to spend more time in Girl World tomorrow - My Nanna needs a card for her 95 year old friend of 71 years - must have pretty flowers on it is the call. Will have to see what I can come up with!

Saturday, May 14, 2011

Missing my Mojo

Hi Everyone,

Well, since I missed Mr Linky in the last Mojo due to computer failure (was the important week too - competition week! typical!) I thought I had better get in early this week. Of course the card has been made for two days, I just haven't been able to load it because Blogger was out of action! Not having much luck with technology these last few weeks. Kinda scary how much we rely on it really.

Anyway, the Mojo Monday Sketch #190, here is my take on it....


I've clear embossed my new Tim Holtz stamp onto red card and sponged purple ink all over it so the design stands out. A trusty spellbinder scallop rectangle cut it out perfectly and a couple of gorgeous embossing folders made a frame on one layer and did some cute little triangle patterns on another. A sizzix lock and key was cut - I've embossed the lock with SU embossing folder and the sentiment is SU as well - also embossed and sponged. a couple of buttons, some raffia taped down and some twine tied around the lock. Hmmm, there was quite a bit in that wasn't there!

Here is the sketch...


I really like the effect of it all anyway, hope you do too :)

Happy Birthday Hubby

Hi all,
It sure is good to get back blogging - blogger has been offline a little during the last week.

I made my hubby a birthday card and used the Corrosive Challenge Sketch #115 to do it.

Here it is.....


and here is the sketch...


Hubby loved the race car, I love the embossing! lol

Hope you like it too :)

Sunday, April 24, 2011

Easter Break Fun with Acetate & Ink

Hi Everyone,

Well, as promised in my previous post, here's an idea of what I've been up to in Girl World this Easter break to get all inky.... the glittery will have to wait till the next post as this one is quite long enough!

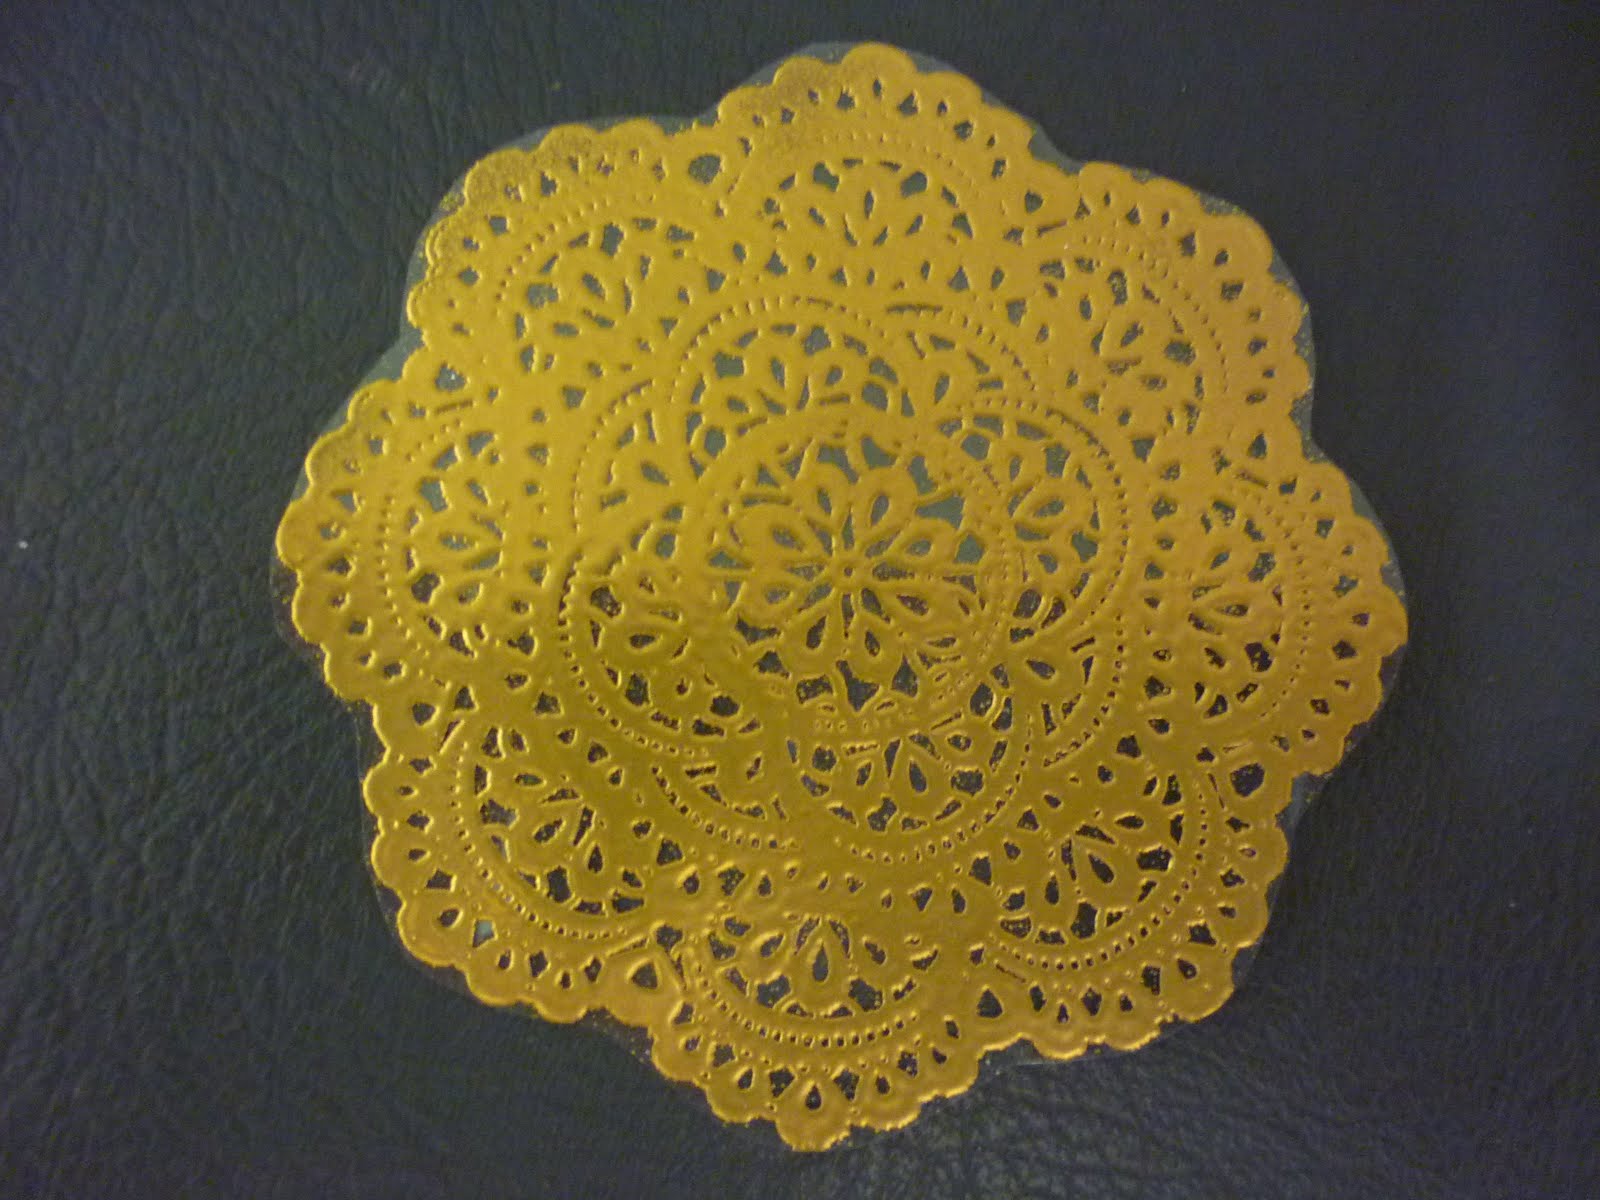
Firstly - I bought a stamp from Kaiser (tea at elsie's collection) that is a wonderful substitute for a paper doily.  I knew I wanted to stamp and emboss on acetate, so that I could cut the image out and it would look like a real doily, but I could then have it in any colour I liked.

Not so easy to start off with, here was my first attempt...

Not so easy indeed - I forgot to use the embossing buddy, the stamp wasn't inked up properly (in my haste), and the acetate is so very slippery!

Well, along came my friend Trish (from Trish and Treasure) and all her wisdom and advice finally lead to a wonderful image. Check out the result!
White, Silver & Gold - wonderful!


Tricks to stop slipping were to lay the acetate over the stamp and gently brayer the image onto the acetate rather than try to press the image down onto the sheet.  Use the embossing buddy to stop the static cling and Wala!
Trish also stamped a heap with white Staz on which also worked a treat and was much quicker...


I told you Trish did heaps - and this is only the half that I kept!

Now while I was madly making Doilies with the acetate - Trish was busy with her alcohol inks and a blender making the most gorgeous colours and patterns on her acetate.

She let me keep some and I've combined her beautiful colours with my embossed doily, a home made flower and a printed sentiment to make the following card..


Aren't the colours just stunning! here's a close up


It's such vibrant colours I think I'll enter it in a few Spring challenges and what not, such as...


Don't forget to come back and check out my next post, it's gonna be very glittery :)
Ciao for now


Friday, April 22, 2011

Mojo 187 - More Water Colour Flowers

Hi Everybody,

I've put together my Mojo 187 Sketch Challenge this week with the remaining flowers from my Water Colouring expedition on the last post. The flower here is from the Fifth Avenue Floral set by Stampin Up. 


As explained before, the stamp has been embossed with white onto watercolour paper, then saturated with water and ink dipped into the pools of water that sit inside the embossed area. This technique is great for getting colours to merge and leaves a wonderful water puddle effect in the ink when it is dry.

Here is a close up so you can see what I mean...

I've used a few different elements to put this card together, Embossing folders, Mini Tag sizzlit, Twine, Spellbinder circles to cut the frame beneath the flowers, my Fiskars cutter to make the scallop edge and last but not least, some beautiful ribbons that I purchased at the Craft Queen

Here is the Mojo Sketch I worked from....


I have started off my Easter break with a massive day in my craft room and promise to post more tomorrow (when all my glittery creations have dried and I can use them!).
Have a great Easter everyone - see you tomorrow!

Sunday, April 17, 2011

I love you Mojo Mum

Hi,


I have had a lovely Sunday watching my friend Trish's daughter acting in the local theatre company's plays today. She's gonna be a star that girl! Two plays in a row today - Cinderella & Aristocats. She made a scrumptious little mousey in the second one, very cute.

Anyway, when I got home I checked my diary and realised that Girl World would be sorely neglected until at least Easter! Too much work happening darn it! 
And so I spent the rest of the afternoon gettin my mojo on.....and here is the result.....


and here is the sketch for Mojo Monday #186....


 That's my Mum sorted for Mothers day, the next will be my Mother in Law no doubt :)

I have used the SU Fifth Avenue Floral rose and used a water-colour ink technique on an embossed image that I then cut out and layered up with some spellbinder circles & scallops. I used SU "Glorius Green" and "Ballet Blue" to colour with. The Manhattan Rose embossing folder was used on the white card at the top, and a Kaiser "I love you" stamped in black for the sentiment. MUM is stuck down in stickers. The floral paper was from a Paper Stack purchased at Big W. and there is some lovely green twine at the top with white ribbon tied in a bow to finish.

The water colour ink technique involved embossing the image on water colour paper. Spray the image with water until it pools inside the embossed areas. Take up a little ink on a brush and just touch the pool of water and watch the ink spread. Mix two colours together for a nice effect. Let it dry. Simple.

Monday, April 11, 2011

Spring Flowers

Hello again,

I've made this really simple card with a wonderful technique taught to me by my SU (Stampin Up) demonstrator - Jane Norrish.

I have stamped and coloured and cut - out my daisies from the SU Every Moment stamp set and then glued them to a beautiful blue sky coloured card. I then ran it through the Big Shot using my SU Textured Impressions embossing folder.

A simple sentiment (pretty sure that's a Kaszazz Happy Birthday), and a piece of ribbon finished it all off nicely.


I was inspired by the picture challenge at 4 Crafty Chicks which shows flowers reaching to the sky....


Isn't it beautiful!

Daring Birdy

Hello Everyone,

I have made this cute little gift card using a few different techniques - just as practice, but I think it turned out great!


There is an emboss releif background that has been brayered, I've used my spellbinder scallop circle to cut a window and mounted the background behind it. I then sandwiched my little cut out and coloured birdy and reeds between it and some acetate. It's a nice shiny window.

Daring Cardmakers have the perfect challenge running - Draw a Bird Day. Well, I coloured a stamped bird? It's the SU Every Moment stamp too, just in case your wondering :)

Friday, April 1, 2011

Macaroon Inspiration

Hello All,

I was browsing my favourite blogs recently and came across the challenge at The Lollipop Ladies, which is to be inspired by this picture of macaroons and add some gloss.


I knew instantly I had something in me for this challenge - those macaroons were shimmering just like a pile of cardstock I had stashed away, and in all the right colours. So here is the card I made....


I scored an inside border on the DCWV textured card so the core was showing, did a little sanding all around the edges and then decided to add some pearl paint. The shimmery cardstocks were cut with my circle spellbinders and run through various embossing folders with my Bigshot. The ribbon is organza and has quite stiff bendy edges on it. I cut a tag out of the same cardstock and stamped a sentiment on it. Then added a little glossy butterfly bead. The tag and the butterfly are tied onto the ribbon with some clear bead making thread. A couple of square blings finished it off.

As usual, I hope you like it - I sure had fun making it :)

Sunday, March 27, 2011

A Mother of Pearl Birthday for Mojo

Hello fellow bloggers,

I have finally used the Mother of Pearl paper that I won at Papermates last Christmas.

The other paper I have made with watercolour paper and some shell stamps.

Here it is...


I have embossed the bottom purple card and swiped some ink over the raised bits to make it really stand out. I love this embossing folder, it's from Stampin Up. The ribbon was purchased recently at the Craft Queen and it's all matted on DCWV textured cardstocks. I have also used my spellbinder circles and scallop circles to cut the sentiment. (name dropper I know :)

 This is the sketch I used for Mojo Monday week # 183


Here is a close up of the shells, I have coated them with glitter and they look fabulous! Hopefully it shows up on the screen.


That's all for now, am off to make a very special person a Birthday card, and I'm not gonna blog it. Why you ask? Well because I'll let her blog it of course!

Ciao for now.

Sunday, March 20, 2011

Sunday Challenge Fun..

Hello Everyone,

I was having a quiet Sunday today with hubby sick in bed (awww), and thought I'd do a couple of challenges.

The first card I made is this one...


Sometimes it's easier when someone else tells you what colours to use, today I used the colours suggested by Just Add Ink in the JAI60 colour combo 
I just happened to have those colours (almost anyway - my crumb cake is a generic one but pretty close).

It then gets easier again when you follow a sketch, this one was from Crafty Ann's, Challenge #36.
I like the simplicity of this sketch and it gave me an opportunity to try out my new spellbinder circles dies. yipee.

Here's the sketch 

The stamp in my image is a favourite from Penny Black, I used my Stampin Up Stamp-a-ma-jig to line up the images and did some masking to stamp over each other.The brads (which matched colours perfectly I thought), were a discount buy from Kaiser Craft. I think I've mentioned this bargain buy before lol. I've done some embossing in one corner and stamped my sentiment in the other on the bottom panel which is revealed by cutting a hole in the top layer.

Hope you like it :)

There are a couple more posts coming today, so keep an eye out for them.


Wednesday, March 16, 2011

Mojo Flower Fold

Hello Everyone,

I am on the ball this week - my mojo is complete - and some!

I had a lot of fun making this flower that my friend Trish taught to me - and she has cased it from somewhere else, so whoever was responsible - thank  you, I love it! It was made with her Owl punch from Stampin Up (am gonna have to get me one of those, along with everything else in that catalogue!!! lol)


I have used the Mojo Monday #182   sketch and whilst my ribbon is twine and doesn't go all the way across, I think all the other elements are represented in my card.


I have really enjoyed making the flower and have made a couple more than this one too - and I'll post them shortly. I had also been dying to use the little letter beads that I found in a discount store somewhere, the Twine (also a discount store purchase) is perfect for threading them on. The embossing folder I used is a cuttlebug on, but I can't remember the name - as usual.

I'd also like to enter this card into the all tied up twine challenge at the cuttlebug spot, because it fits this card perfectly requiring twine and dry embossing.

Saturday, March 5, 2011

Papermates - March 2011

Hello Everyone,

I have been slack and still haven't finished my third Spesch Stamps card - even after a full day at papercrafting, I guess there was just too much else going on at papermates today. Which is why I am here tonight - blogging! (and I had to beat my friend Trish to the post for a change - man that girl is organised!)

Today we had Amanda Cordingley - a Kaszazz rep (did I spell that right?) - do a make and take for us. Always a bit of fun. We made a beautiful paper flower - which I stuck to the front of the card I made today, and we also made a lovely card.

Here is the card Amanda organised for us:-


It really is quite pretty. The background was embossed and sponged over with distress inks. The tag was was also sponged over with distress inks after stamping the sentiment. The butterfly was stamped, cut out and coloured in with a water brush and some more distress inks. I love it.

The card I made was a bit of an experiment and there are quite a few things I would change when doing the next one - the size for instance! lol. This one turned out a bit large :) It is a slider card and I love the concept, but will be playing with a template for this type of card I think before making it again.


Note Amanda's flower stuck to the front.Oh, and the pull / hold tabs are my spellbinder Labels die. As usual I can't remember which number labels they are!


This flower is so very easy to make. Simply torn paper, curled with a wooden skewer and stuck together with a little punched flower and bling. Very effective.

Anyway, that's it for today. Hope you like the products of my day.