Saturday, June 30, 2012
Stationery Set Friend
Friday, June 22, 2012
Hello Card
Sunday, May 13, 2012
Mojo Strikes Again!
I’ve been using up the Designer Paper I purchased with the Stampin’ Up Sale-A-Bration a few months ago and it has worked beautifully here! Once again the stamps from the Vintage Vogue stamp set have graced my card, the lovely swirly background was stamped in Sahara Sand and the two different sized flowers were stamped in Sahara Sand and Pool Party inks then fussy cut out. There’s also a new purchase or two – the Finial Press embossing folder and Victoria Lace ribbon!
Do you like that curly banner? So very easy to do! I have cut a curly label into in circle by first cutting the window using the Movers and Shapers die in the Big Shot, and then cutting the circle. That is then wrapped with a strip of coordinating designer paper to create the curly banner and layered onto a bigger circle that has the sentiment stamped right where the curly label was cut out. Pumpkin Pie ink was used to stamp the Thank You sentiment from the set called Thank You Kindly.
A few pearls, paper twirls made from trimming scraps and rounded corners finished this card off nicely.
Obviously it is the Mojo Monday sketch this week…
I would also like to share it at the following:-
Hiding In My Craftroom – Super Scraps Saturday Daring Cardmakers – Fussy Cuts Do You Stack Up – Use a Flower Card Makin Mamas – May Flowers
Thanks for stopping by, hope I’ve inspired you to go Hide in Your Craft Room!
Wednesday, May 9, 2012
A Cascading Card Friends
that cascades as it opens!
The template was provided to me by one of my Stampin’ Up colleagues – thank you Anne! I love how simple this card was. Just two sections of card slotting together with coordinating folds. Here it is again to give you a better idea of how it collapses flat and cascades when it is open.
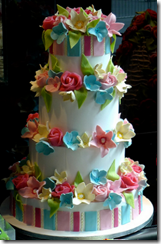
All in all this card was perfect to share at Card Makin Mamas this week for their Spring Photo Challenge. Check out this cake – the layers remind me of my card – cascading! The colours I used are almost right, but it the shape of the cake more than anything that was inspiring for me.
I’ll be back in a couple of days with some gorgeous little treat boxes that I’ve been making to use for presents. I’m sure you’ll love them.
Have a great day…
Saturday, April 28, 2012
Card for my Mother
Faux Tile Mojo Mum
Thursday, April 12, 2012
Blossom Petals Fabulous Friend Card
AND,
because Twisted Tuesday Challenges is a new Challenge Blog,
Wednesday, April 11, 2012
Blossom Petals Dress Card
and
Stamptacular Sunday #158 – Photo Inspiration
( all those layers of petals did it for me!)
Sunday, April 8, 2012
Hand Bag Card Tutorial
Hello Everyone,
I shared this tutorial on my Stampin Up blog, but I think it’s going to be too hard to maintain two blogs, so I’m moving it to here and closing down the Stampin Up one when my trial period ends.
This tutorial is for making the Top Note Hand Bag card.
It has been cased from several other Stampin' Up demonstrators so thank you to all the lovely ladies who have made this before, it's a great, girly card and my very first workshop was a great deal of fun because of it!
I chose to make the card in Regal Rose with Soft Suede to give it a vintage look.
MATERIALS
Base Card – 15cm x 21cm Regal Rose Card Stock
Matching Designer Paper – 14.5cm x 10cm
Whisper White Card Stock – 15cm x 12cm
5/8" Satin Ribbon in Whisper White x 15cm
Inks – Regal Rose & Soft Suede
Stamp set – Vintage Vogue
Embossing Folder – Square Lattice
Cutting Tools - Big Shot using Top Note die
1 x Pearl
Sponge, scissors, dimensionals.
METHOD
- Cut Whisper White Cardstock with Top Note die. Retain the scrap piece.
- Stamp the Floral Vine pattern from Vintage Vogue onto the bottom right corner of this with Soft Suede ink.
- Stamp the Floral Vine pattern several times onto the left side of the designer paper with Soft Suede ink.
- Stamp the small flower from Vintage Vogue with Soft Suede once onto the Top Note and twice onto the paper as shown on sample. Do not re-ink the flower between the two stamps on the paper to give a softer tone.
- Also stamp one flower with Soft Suede onto the scrap of Whisper White.
- Clean the flower stamp and stamp again with Regal Rose ink as shown, as well as onto the scrap of Whisper White.
- Fold the Top Note over to make the bag, ensuring that the stitching from the die cut is prominent on the stamped side. Trim off the pointed ends that stick out with scissors.
- Run the 'flap' of the bag only through the Big Shot in the Square Lattice Embossing folder. Stick the flap down with adhesive.
- Sponge & distress all edges where needed.
- Adhere ribbon to back of hand bag.
- Distress & Sponge the edges of the designer paper and adhere to card front.
- Adhere bag to front on an angle, leaving room for the sentiment.
- Stamp the sentiment onto the designer paper in the bottom corner using Soft Suede.
- Cut the small flowers stamped on the scrap out and adhere as bag clasp with a dimensional, then top with a pearl.