CLICK HERE FOR FREE BLOGGER TEMPLATES, LINK BUTTONS AND MORE! »
Showing posts with label Square Lattice Embossing. Show all posts

Monday, July 30, 2012

Masculine Card

Or is it? Does it matter? 
It has Masculine colours, just not sure all those swirls would appeal to a man? I asked my husband if he thought it masculine enough and he said “you know what, men just don’t care, but Yes, it is a bit masculine” How’s that for honesty I ask you?

P1030717

Well, this card was made for a man who really does mean the world to me – and surprise, It’s not my husband! This man is however related to me, so don’t go thinking there’s some funny business happening here!

The sentiment comes from the Word Play set by Stampin Up, there are two embossing folders used on this card – the Square Lattice & Finial Press. The Top Note die was used to cut Real Gray CS and then was cut in half and scored along the bottom a couple of times using the Simply Scored tool and the Swirls Sizzlit was used to add a little decoration. A button from the subtles collection added some interest as did the little brads.

I used the sketch challenge at
Sunny Challenges and Creations this week, which is the sketch and a male theme too if you can manage it.

SC 05112

I’ll also enter this card into the SUO Challenge which calls for button and brads this week. Perfect! I hope this provides you some inspiration for making a male themed card, but hey – the males just don’t care anyway, so please yourself.
Signature Watermark

Sunday, July 8, 2012

Inspired Wishes

Hi Everyone,

I’ve been playing with some items that are new to me – rubber of course! Getting all inky with it and being inspired by not just the ink, but by a sketch challenge too!

P1030647

I got a little ‘rippy’ with the paper and have a great tip for you. If you want to tear the edges of paper and can never get it to tear relatively in a straight line – Use a water brush to run a line of water around the edge of the paper to soften it, then simply pinch off the edges – they go all pulpy and easy to pull off but give a torn edge look.

The sketch inspiring me today was from a new challenge site called Sunny Challenges and Creations, and here is their sketch for this week…
SC 04812

I love the Inspired by Nature stamp set – it’s new to me – and I have no idea why I waited this long to buy it! Just look at what I made my very first go at inking it up. It’s been stamped in Old Olive and Chocolate Chip. I used these colours because that was the second part of Sunnys’ challenge – to use these colours, but they look awesome together anyway.

P1030646

Another new to me stamp set is the Sincere Salutations – how beautiful are they – and they fit inside the X-Large Oval punch perfectly, which in turn fits inside the lovely frame from the Lots of Tags sizzlit. (I’ve embossed it using the Square Lattice folder just to give it some oomph.)

P1030645

Card Makin Mamas also have a challenge going to “get out the rubber” – I don’t think I could have found more rubber than that unless I was at the drags on a Saturday night! lol
The other place I’d like to share this is Inspire me Fridays – the stamp set is Inspired by Nature and the name kind of fits with challenge don’t it?

Well that’s it from me for now, I’ll be back again to share some more ink around Smile
Signature Watermark

Tuesday, July 3, 2012

Matchbook Note Holder

Hi Everyone,

Just thought I’d quickly share this cute little matchbook that I made some time ago now.
P1030353

It was done in Rich Razzleberry / Tempting Turquoise / Black card stock. For a little project, there sure are quite a few tools used here:-
Beautiful Wings Sizzlit die, Scallop Oval Punch, Large Oval Punch and the  Extra Large Oval Punch, Scallop Edge punch, and Ribbon Border Punch! Embossing folders – Square Lattice and Designer Frame, stamp sets – Oval All and My Friend.

The stamped image was done on glossy paper and sponged over with matching inks – maybe a little Island Indigo too – since I love that colour so much! It was then cut out with the Extra Large oval punch – as this fits inside the Designer Frame almost perfectly! I just ripped around the frame for a rustic edge.

Here it is opened up
P1030354

And here’s a different view
P1030355

If you’d like to make one of these yourself, there is a tutorial on Split Coast Stampers you can go in search of.

 I’d like to share it with
Come and Get it Challenges – cute as a bug , and I picked the cutest bug of course – a butterfly!

Hope I’ve given you some inspiration – be back in a day or so again Smile
Signature Watermark

Friday, June 29, 2012

21st Birthday Card for a Man

Yes, he is now a Man!
Happy Birthday to my nephew Jason – he is off partying hard in Surfers Paradise with his mates for his birthday so I haven’t actually given him this card yet! Bless him, he’s usually such a good boy it’s good to see him mucking around a bit Smile
P1030607

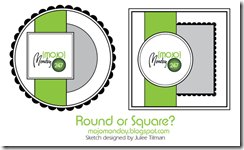
I used the Mojo Monday sketch for a bit of inspiration and went to town with textures for this card. I used the Simply Scored tool to make a diamond pattern on Crumb Cake CS and then swiped a Not Quite Navy ink pad over the raised areas – very roughly. I also used a pile of brads and string and faux stitching and wild drawing to make the circle in the pattern. I went a bit wild with the drawing and covered it up with a circle of Not Quite Navy CS. The colours have come up a bit funny in my photograph, they are matted onto black, but it kind of looks blue? Anyway, here’s the sketch…
Mojo247Sketch

The numbers were random chipboards found in my stash and I coated them with some So Saffron ink and then stamped the floral pattern from the Hello Friend stamp set over that with Not Quite Navy ink and then..embossed the top with clear embossing powder to make it shiny. See..
P1030609

Well I hope you like my Mojo Monday card this week. I'm also going to enter it for My Mojo Monthly Challenge at La-De-Dah, as the theme is Man Up
 I look forward to sharing some more stuff soon.

Signature Watermark

Sunday, June 24, 2012

Prayer Card

Hi Everyone,

A friend of mine has received some traumatic news in relation to the health of a loved one and I made this card to let her know that she is not alone.
P1030598

The cross was hand cut so it’s a little wonky, but hey – nothings perfect is it? It’s been embossed with the Lattice Square Embossing Folder. The sentiment is from retired set that I fail to have the name of, but it fits perfectly in the Word Window!

This lovely Wisteria Wonder coloured paper from the  Berry Blossoms Designer Series Paper pack has been machine sewn onto the matching cardstock – gotta love Stampin’ Up for their co-ordination of colours across the whole range, it makes things so very easy!

P1030599

The flower was made using the Blossom Petals Builder punch and some cardstock scraps in Wisteria Wonder and Whisper White. A few pearls added to the centre and quick misting of Shimmer Paint Mist and a lovely flower is born.

I’ve used the sketch at Freshly Made Sketches this week, well almost!

         FMSketch 40

Thanks for checking it out and I look forward to entertaining you some more next week.
Why so long you ask? Well, End of Financial Year for us bookkeepers means I’ll be busy this week doing Payroll EOY for 4 different clients! Yep – busy, busy, busy earning some dollars in order to spend some dollars! lol

Have a great week now, I know I will (sarcasm)
Signature Watermark

Wednesday, June 6, 2012

Summery Christmas Card

Hi Everyone,

Well, I’ve been making Christmas Cards all year and I thought, this is Australia – we don’t have snow and cold weather at Christmas time! Then I saw the challenge at SUO Challenges this week – Bright Summer Days. Perfect! a Bright Summery Christmas Card that all my Aussie mates will appreciate.

P1030543

Poor wee Dasher looks a bit lost in all this heat, he’s been clear embossed and sponged over with Lucky Limeade, Daffodil Delight and Real Red inks. I’ve used the Square Lattice & Finial Press embossing folders, as well as the lovely Pleated Satin Ribbon that is in the current Winter Mini Catalogue.

I also wanted to have a play with my new “Simply Scored” the scoring tool – also in the current Winter Mini Catalogue - and what better way than to make one of the ever popular concertina fold flowers. I just used Cream cardstock and sponged it with the same colours as the rest of the card.

P1030546

I put the sentiment on the leaf – it’s punched using Blossom Petals Builder punch. I knew that punch would come in handy! The centre of the flower is from the matching Stamp Set. The other thing I’ve done, and I don’t know if you can see it in the little pic above, but I sprayed some home-made Shimmer Paint Mist all over this baby! Just because it’s a Summer Christmas, doesn’t mean it don’t sparkle! lol

I utilised the sketch at 52 Christmas Card Throwdown this week. Finally have had a chance to get one in on time.

Don’t forget the Winter Mini finishes July 31st  so get your orders in before it’s gone!

Have a great day,evening, night whatever it may be in your neck of the woods.
Signature Watermark

Monday, May 28, 2012

Pop Up Card

Hi Everyone,

I’m back with two great Pop Up cards that are perfect for an adult male – which is just as well, because we have 5 birthdays for boys coming up in the ensuing weeks! I kept the front of both cards the same and pretty CAS too. A few score lines and an embossed frame with sentiment inside and voila! Two cards for Men.

P1030515

I love the final result here on the inside. Once again the ribbon border punch was used on one and the lattice embossing folder was used on the other to create some fake ribbon wrapping around each box. The little bits sticking up are supposed to represent the ribbon on top. The background was stamped with an old Linen Background stamp and Crumb Cake ink to match the base.

   P1030514        P1030513

The papers are from the Stampin’ Up Well Worn pack. I went crazy buying paper this month because of the Stampin’ Up Paper Party promotion. What value One option is to Buy 3 packs and get the 4th one FREE! I couldn’t resist – if you want to take advantage of this promo yourself, check out my Stampin’ Up Website and click on the Promotions. It ends 30th May so get in quick!

This is what the folds look like from above…

P1030519

The insert is cut and scored to pop up each present so it looks like they are sitting one atop the other. It was cased from someone else of course, no way I would think of something this simple, yet clever! Hope you like it Smile
Signature Watermark
Enjoy to share this with…

Sunday, April 15, 2012

My Friend Mojo Card

Hello Again,

I’ve done the Mojo Monday sketch again this week, wow – 2 in a row – I’m getting into it! This card was made after an inspiring day with Jane Norrish & other demonstrators here on the Gold Coast.

P1030414

Not only was I taught by one of the ladies how to make this fabulous flower, but I learned a new technique with paper that is great for using up bits and pieces.
 Do  you like that background?
I also experimented on this card with dyeing the ribbon with matching ink, it certainly likes to suck up the colour, so I only used a little bit as a feature, It's Pool Party ink.

P1030411

Check out the dimension in that flower! We used the Blossom flower punch with is in the current Autumn-Winter mini catalogue and some Pool Party cardstock. 
I love those 2012-2013 IN colours!

P1030412P1030415

Here I’ve teamed the Pool Party flower with Calypso Coral card base, some Whisper White that was embossed with the ever faithful Square Lattice embossing folder. The My Friend set sentiment was lined with Calypso Coral Bakers Twine to define the edges, which was then laid over my gorgeous background of coloured patchwork strips.

Here’s the Mojo Monday sketch…
Mojo236Sketch

Hope you like my take on the sketch this week. Hope also to be back next week with another one, if I don’t post anything in between – See you then!
Signature Watermark

Sunday, April 8, 2012

Hand Bag Card Tutorial

Hello Everyone,

I shared this tutorial on my Stampin Up blog, but I think it’s going to be too hard to maintain two blogs, so I’m moving it to here and closing down the Stampin Up one when my trial period ends.


This tutorial is for making the Top Note Hand Bag card.


It has been cased from several other Stampin' Up demonstrators so thank you to all the lovely ladies who have made this before, it's a great, girly card and my very first workshop was a great deal of fun because of it!

top note handbag card

I chose to make the card in Regal Rose with Soft Suede to give it a vintage look.

MATERIALS

Base Card – 15cm x 21cm Regal Rose Card Stock

Matching Designer Paper – 14.5cm x 10cm

Whisper White Card Stock – 15cm x 12cm
5/8" Satin Ribbon in Whisper White x 15cm
Inks – Regal Rose & Soft Suede


TOOLS

Stamp set – Vintage Vogue

Embossing Folder – Square Lattice

Cutting Tools - Big Shot using Top Note die

1 x Pearl

Sponge, scissors, dimensionals.

METHOD

  1. Cut Whisper White Cardstock with Top Note die. Retain the scrap piece.
  2. Stamp the Floral Vine pattern from Vintage Vogue onto the bottom right corner of this with Soft Suede ink.
  3. Stamp the Floral Vine pattern several times onto the left side of the designer paper with Soft Suede ink.
  4. Stamp the small flower from Vintage Vogue with Soft Suede once onto the Top Note and twice onto the paper as shown on sample. Do not re-ink the flower between the two stamps on the paper to give a softer tone.
  5. Also stamp one flower with Soft Suede onto the scrap of Whisper White.
  6. Clean the flower stamp and stamp again with Regal Rose ink as shown, as well as onto the scrap of Whisper White.
  7. Fold the Top Note over to make the bag, ensuring that the stitching from the die cut is prominent on the stamped side. Trim off the pointed ends that stick out with scissors.
  8. Run the 'flap' of the bag only through the Big Shot in the Square Lattice Embossing folder. Stick the flap down with adhesive.
  9. Sponge & distress all edges where needed.
  10. Adhere ribbon to back of hand bag.
  11. Distress & Sponge the edges of the designer paper and adhere to card front.
  12. Adhere bag to front on an angle, leaving room for the sentiment.
  13. Stamp the sentiment onto the designer paper in the bottom corner using Soft Suede.
  14. Cut the small flowers stamped on the scrap out and adhere as bag clasp with a dimensional, then top with a pearl.

Signature Watermark